The Ultimate Guide to Microneedling: What to Expect Before, During, and After
Somewhere between a relaxing facial and a full-blown cosmetic procedure lies microneedling — a minimally invasive treatment that has quietly become one of the most popular skin rejuvenation options in dermatology clinics and med spas worldwide. Whether you're battling acne scars, fine lines, uneven texture, or just chasing that lit-from-within glow, microneedling promises real results without the downtime of more aggressive treatments.
But what does the process actually look like from start to finish? If you've been curious — or a little nervous — this guide walks you through everything you need to know before, during, and after your microneedling session.
What Is Microneedling, Exactly?
Microneedling, also known as collagen induction therapy (CIT), uses a device equipped with fine, sterile needles to create thousands of tiny, controlled micro-injuries in the skin's surface. These micro-channels trigger the body's natural wound-healing response, stimulating the production of collagen and elastin — the two proteins responsible for keeping skin firm, smooth, and youthful.
The result? Over the weeks following treatment, the skin rebuilds itself with a stronger, more even foundation. Scars soften, pores appear smaller, fine lines diminish, and overall skin tone and texture improve.
Professional microneedling devices — such as the SkinPen, Dermapen, or Morpheus8 (which combines microneedling with radiofrequency energy) — use adjustable needle depths ranging from 0.5 mm to 2.5 mm, allowing practitioners to customize treatment based on the target concern and the area of the face or body being treated.
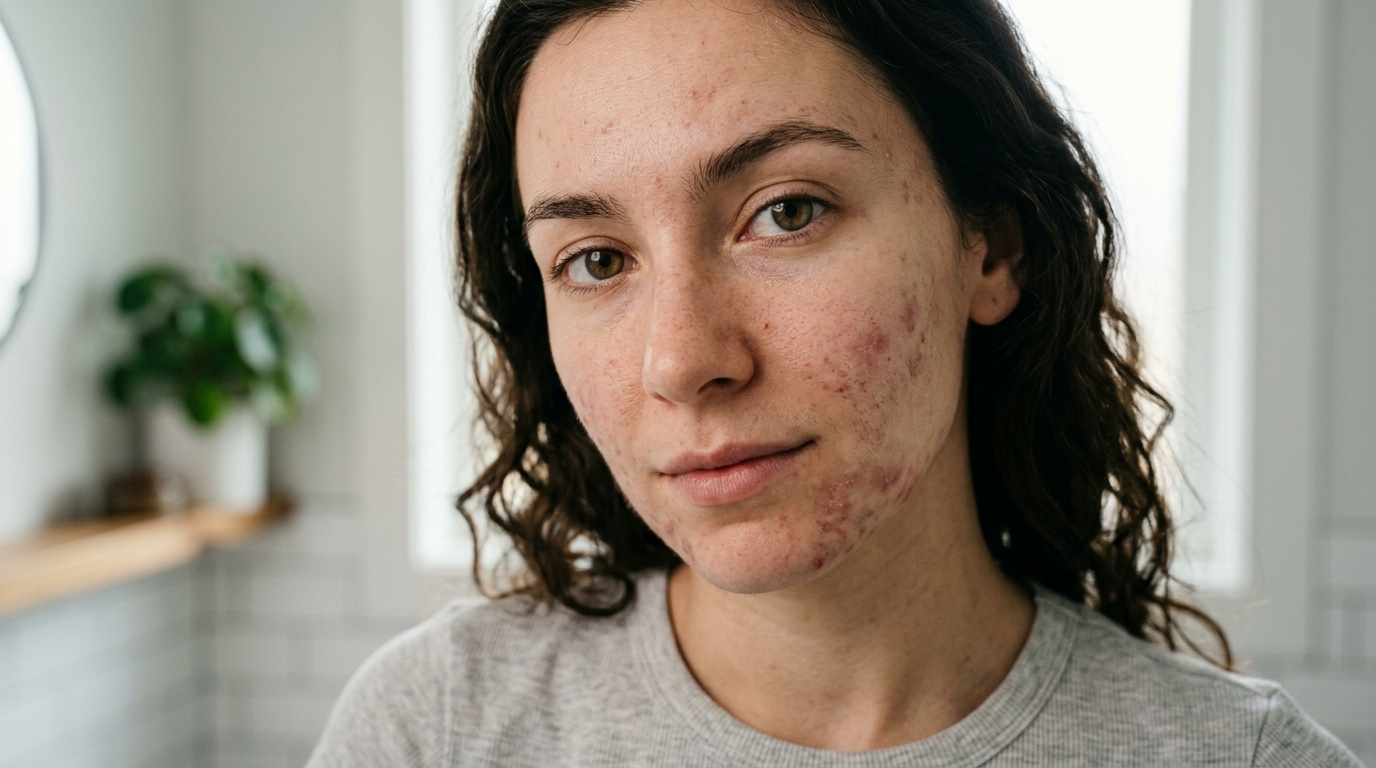
Who Is a Good Candidate?
Microneedling is suitable for a wide range of skin types and tones — one of its major advantages over laser treatments, which carry a higher risk of hyperpigmentation on darker skin. It's commonly used to address:
- Acne scars (rolling and boxcar types respond especially well)
- Fine lines and wrinkles
- Enlarged pores
- Uneven skin texture or tone
- Hyperpigmentation and melasma
- Stretch marks
- Surgical scars
- Sun damage
That said, microneedling isn't for everyone. You should avoid it — or at least postpone — if you have active acne breakouts, eczema or psoriasis flare-ups, open wounds, a history of keloid scarring, or if you're currently pregnant. A consultation with a licensed dermatologist or aesthetician is the essential first step.
Before Your Session: How to Prepare
Preparation starts well before you walk into the clinic. What you do in the days and weeks leading up to treatment can significantly affect your results and your comfort level.
1–2 Weeks Before
- Stop using retinoids and exfoliating acids. Products containing retinol, tretinoin, glycolic acid, salicylic acid, or any active exfoliant should be discontinued at least five to seven days before treatment. These ingredients thin the skin's outer layer and can increase sensitivity and irritation during the procedure.
- Avoid prolonged sun exposure. Sunburned or heavily tanned skin is more vulnerable to post-treatment complications. Wear broad-spectrum SPF 30+ daily — which you should be doing anyway, but now it's non-negotiable.
- Skip blood-thinning supplements. Aspirin, ibuprofen, fish oil, vitamin E, and certain herbal supplements (like ginkgo biloba) can increase bleeding and bruising. Check with your provider about what to pause.
The Day Of
- Arrive with a clean face — no makeup, sunscreen, or moisturizer unless your provider instructs otherwise.
- Eat a light meal beforehand. The procedure isn't painful for most people, but going in on an empty stomach is never ideal.
- Communicate openly with your provider about your skin history, any medications you're taking, and your specific goals. The more they know, the better they can tailor the treatment.
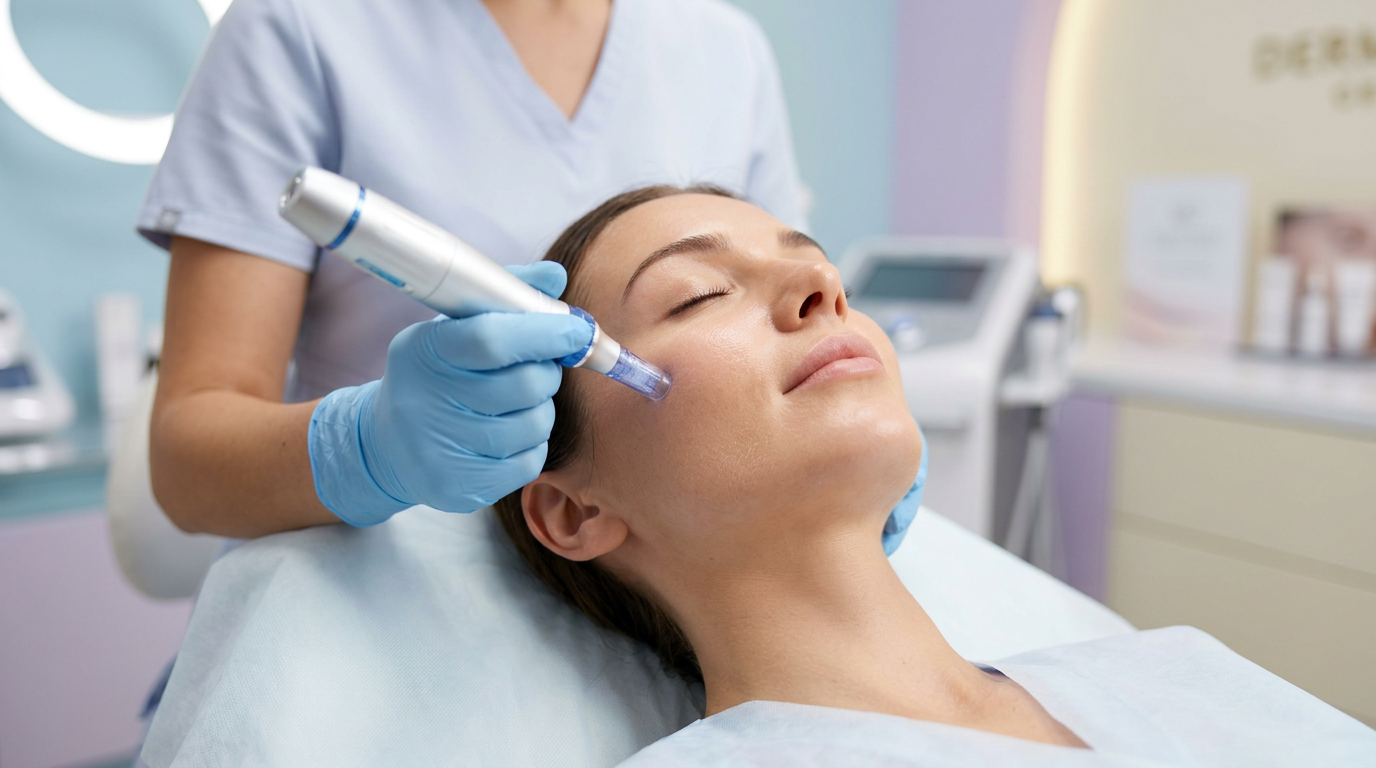
During the Procedure: What It Actually Feels Like

Here's the part most people are most anxious about — and the part that's usually less dramatic than expected.
Numbing
Your provider will apply a topical numbing cream (typically containing lidocaine) to the treatment area 20 to 30 minutes before starting. By the time the device touches your skin, the numbing agent has taken full effect. Most patients describe the remaining sensation as a light scratching or vibrating feeling — mildly uncomfortable in sensitive areas like the nose, upper lip, and forehead, but far from unbearable.
The Treatment
The microneedling device is moved across the skin in systematic passes, covering the entire treatment area evenly. A hyaluronic acid serum is often applied during the procedure to help the device glide smoothly and to deliver hydration deep into the freshly opened micro-channels.
The entire process typically takes 20 to 40 minutes for a full face, depending on the areas treated and the depth of the needles used. Deeper needle settings (1.5 mm to 2.5 mm) are reserved for more stubborn scars and typically cause more pinpoint bleeding, which is completely normal.
What You'll See Immediately After
When the device is set down, your skin will be red — think moderate sunburn. You might notice some pinpoint bleeding, especially in areas treated at deeper depths. Your face will feel warm and tight, almost like a mild windburn. Your provider will typically apply a calming serum, a hydrating mask, or a growth-factor solution to soothe the skin and kickstart healing.
After the Procedure: Recovery and Aftercare
This is where patience pays off. Your skin just went through a controlled injury, and how you treat it over the next few days and weeks directly impacts your results.
Days 1–3: The Healing Phase
- Redness and swelling are normal and usually peak within the first 24 hours before gradually subsiding. Most people look and feel significantly better by day three.
- Avoid touching your face as much as possible. Your skin's barrier is temporarily compromised, making it more susceptible to bacteria and irritation.
- Skip makeup for at least 24 hours — ideally 48. When you do resume, use clean brushes and mineral-based products.
- Use only gentle, fragrance-free products. Your provider will likely recommend a simple routine: a mild cleanser, a hydrating serum (hyaluronic acid is your best friend here), and a rich, occlusive moisturizer.
- No active ingredients. Retinoids, vitamin C serums, AHAs, BHAs, and exfoliants are off-limits for at least five to seven days post-treatment.
- Sunscreen is critical. Your freshly treated skin is extremely photosensitive. Apply a broad-spectrum SPF 30 or higher every morning without exception, and reapply throughout the day if you're outdoors.
Days 3–7: Peeling and Renewal
- Some patients experience mild flaking or peeling as the skin sheds its damaged outer layer. This is a normal part of the regeneration process. Resist the urge to pick or scrub — let it happen naturally.
- Hydration is your top priority. Drink plenty of water and keep your skin moisturized.
- Most people feel comfortable returning to work and social activities by day two or three, with any residual redness easily covered by tinted sunscreen or light mineral makeup.
Weeks 2–6: Results Start to Show
Collagen remodeling doesn't happen overnight. While you might notice an initial glow once the redness fades, the real improvements — smoother texture, softened scars, firmer skin — develop gradually over four to six weeks as new collagen and elastin fibers form and strengthen.
For optimal results, most providers recommend a series of three to six sessions, spaced four to six weeks apart. Maintenance treatments once or twice a year can help sustain the benefits long-term.
Managing Expectations: What Microneedling Can and Can't Do
Microneedling is powerful, but it's not magic. It works best as part of a consistent skincare strategy that includes sun protection, proper hydration, and targeted active ingredients used between sessions.
It excels at improving texture, tone, and mild to moderate scarring. It can soften fine lines and give skin a noticeably healthier appearance over time. However, deep wrinkles, severe acne scarring, and significant skin laxity may require more intensive treatments — such as fractional laser resurfacing, deeper chemical peels, or surgical options — sometimes in combination with microneedling.
It's also worth noting the difference between professional microneedling and at-home derma rollers. Consumer devices use shorter needles (typically 0.1 mm to 0.25 mm) and can modestly improve product absorption, but they don't penetrate deeply enough to trigger meaningful collagen production. For clinical results, professional treatment with a medical-grade device is the standard.
The Bottom Line
Microneedling sits in a sweet spot that few cosmetic treatments occupy: it's effective enough to deliver visible, lasting results, yet gentle enough that most people can return to their routine within a couple of days. The key to a great experience is threefold — choose a qualified provider, follow pre- and post-care instructions carefully, and be patient with the process.
Your skin spent years developing the texture and scars you're looking to improve. Give it a few weeks of disciplined aftercare, and you'll start seeing the kind of change that makes the temporary redness and downtime feel more than worth it.

Leave a comment
This site is protected by hCaptcha and the hCaptcha Privacy Policy and Terms of Service apply.